How to use the new PaperCut Print system
All new Toshiba multifunction printers (MFPs) will be streamlined to have the same buttons/functions. The image below is an example of the main login screen and button functions.
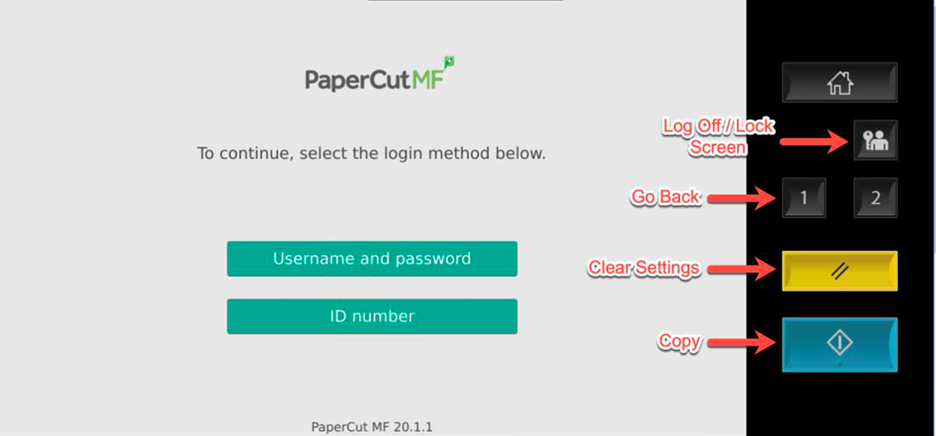
There are 3 ways to login to the MFPs…
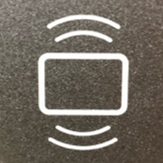
- Tap your Barry ID card on the MFP at the icon (shown below) to left of the touch panel. The first time you do this, you will be prompted to enter your Username and Password to associate the card with your account. After that, simply TAP and it will identify your account.
- Type ID number. You will need to type "emp" or "stu" before your ID number (see format examples below):
- Employees use the format: emp#######
- Students use the format: #######
- Enter Username (full email address) and Password
Once logged in, you have 3 options:
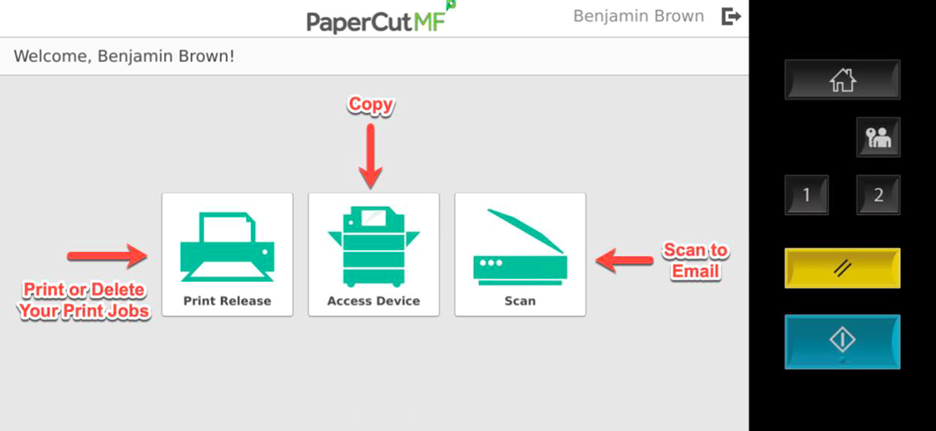
- Print
- Copy
- Scan - to Email, Fax, or OneDrive
The system will automatically log you off after 45 seconds of no activity. To manually log off, you can click the Log Off / Lock Screen or Clear Settings buttons (see image above), or click the log out icon next to your name in the top section of the touch screen (see image below).
How to Submit a Print Job
We will be deploying PaperCut Print Deploy Client to all university computers. Once the software is installed, it will automatically open its main window (see below), prompting the user to sign-in.
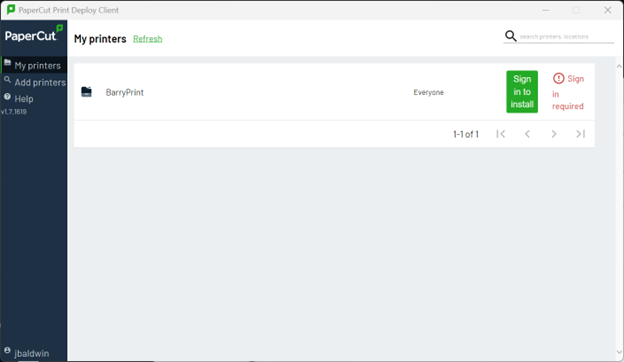
Once you sign-in, the new BarryPrint_Windows print queue (or BarryPrint_macOS on macOS computers) will be installed on the computer, and will appear in your printer list when you go to print. If you see the green Sign In button (as shown in the image above), do so to complete the installation. Use this print queue to send all print jobs to the new release print system.
The BarryPrint_Windows and BarryPrint_macOS print queues allows you to select Staples and specific paper trays (or manual feed) if needed.
The BarryPrint print queue, is an optional/backup queue, listed in the Add Printers window. This queue does not allow you to select Staples or specific trays.
*** All print jobs will be held in a secure queue until you release (print) them or delete them from the job list at an MFP. If not printed or manually deleted, they will be automatically deleted after 24 hours. ***
How to Release a Print Job
Login to an MFP (see steps above). Once logged in, you’ll see the number of print jobs/pages in your queue at the top of the screen. You can select the Print all button to print them all with no changes.
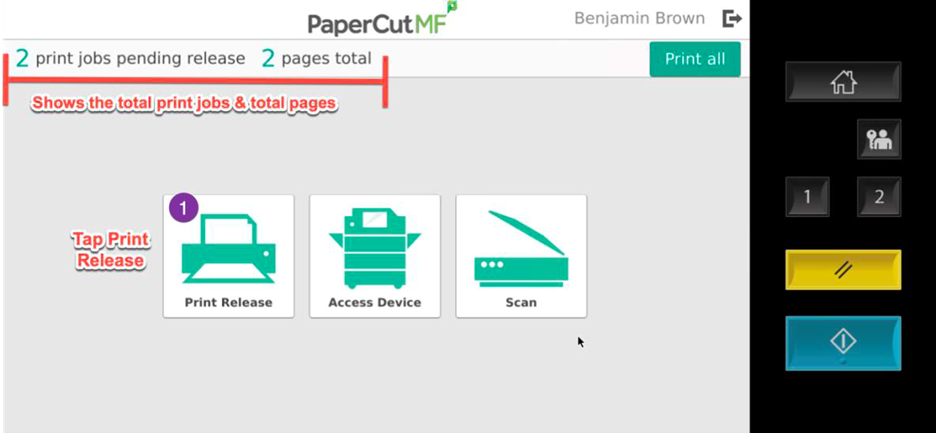
Or tap the Print Release button, to view the print job list. Here you can select the specific print job you want to print, and optionally change settings (# of copies, single/double-sided, etc) by tapping the ">" button to the right of the print job.
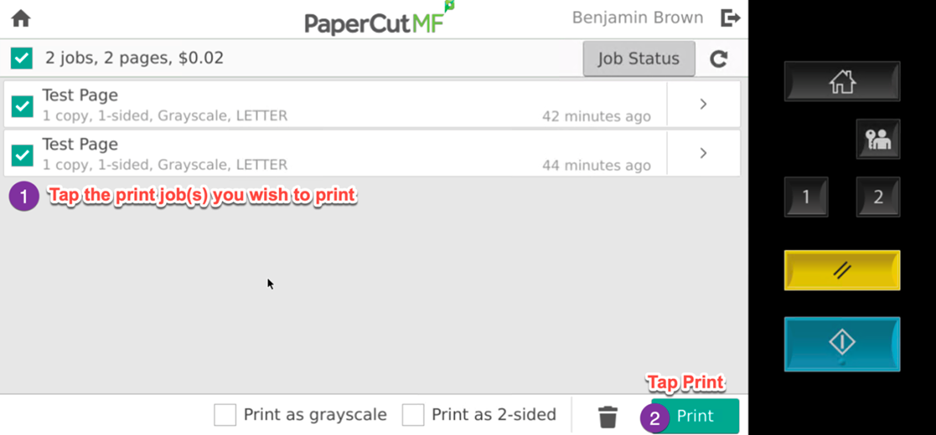
Select the desired job and tap Print.
You can also manually delete a print job if desired (before the 24-hour time limit).
*** The default settings for university print jobs are B/W and Double-sided. ***
How to make Copies
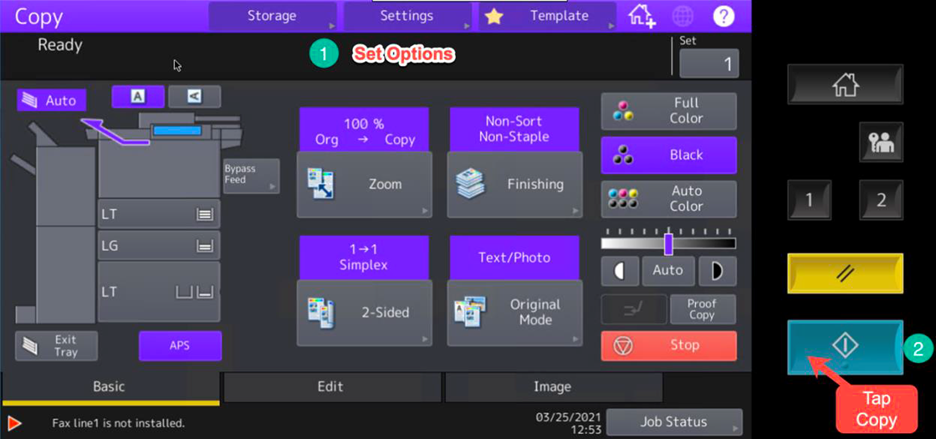
Login to an MFP (see steps above) and tap the Copy button. The screen will change to the MFP's copy interface, showing choices for 1 or 2-sided, B/W or Color, # of copies, etc. Tap the Copy physical button to start the copy, or you can tap the 1 button to go back (see example image below).
Scan to Email/Other email
When you select Scan to Email, your Barry email is automatically used as the source for the scanned email. You can change the Filename for the scanned file or change DPI and other settings (these are all optional). Then load the paper to scan and tap Start. When prompted you can load additional paper or simply tap Finish to completed the scan and send the email.
The scanned page(s) will come into your Barry email inbox, with your Barry email as the sender. If you don’t see the email in your inbox, check your Junk folder.
Scan to Other Email works the same way, except you must fill in the Email field for the email you want to send the scans to.
Scan to OneDrive
Scan to OneDrive works similar to Scanning to Email (options to change the Filename, DPI and other settings), but the scanned images are sent to a file in your Barry OneDrive storage, in the folder/path "Apps/Scans for PaperCut MF".
Once the scan is sent to OneDrive, you will receive an email from scans@papercut.com, with a green Go to your scan! button/link. Clicking the link will allow you to view the document directly within a web browser. As stated above, the scanned images are saved to the "Apps/Scans for Papercut MF" folder in your Barry OneDrive storage, where you can access them as you would any other files stored in OneDrive.
Scan to Fax (employees only)
When you select Scan to Fax, press the "+" button to manually enter the Fax number (10-digit number only, no leading 1 or 9 needed), Recipient name, and the Recipient company name (this field is optional), then press Add Recipient. At the Scan Details page, you can tap Start to scan and fax, or add another recipient (if you want to send a single fax to multiple recipients).
The document will be scanned and sent securely to our Xmedius server, then faxed out to the destination you identified. Within a few seconds you will receive an email from PaperCut (PrintNotification@barry.edu) confirming the scan was sent to the Xmedius server. The actual faxing takes a few minutes, so after 4-5 minutes you will receive an email from Xmedius (system@xmedius.com) with a confirmation page indicating the fax was sent successfully (or if there were errors). This email from Xmedius is your fax confirmation email.
Colleague Printing:
To print from Colleague to the new print system, do the following:
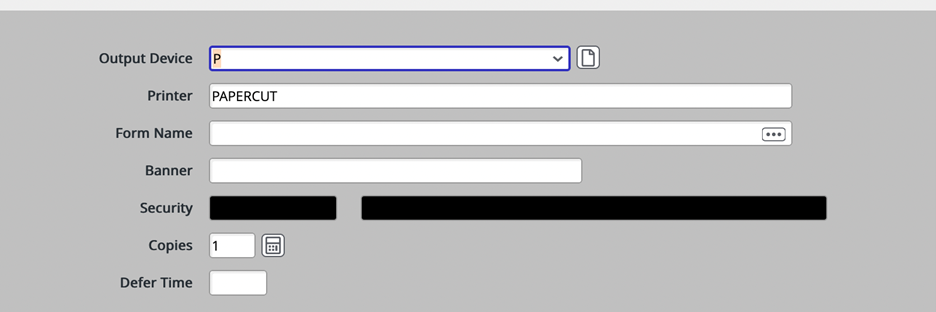
- Type a “P” in the Output Device field (see image below).
- Type “PAPERCUT” in the Printer field (see image below).
- Then proceed as you normally would to print.
Your job will then go into the secure queue, and you will need to login to one of the new Toshiba MFPs to release/print the job.
Stapling
To add staples to your print jobs, make sure to print to the BarryPrint_Windows (or BarryPrint_macOS) print queue at the time of printing. In the Printer properties windows, you can select staples and/or you can select specific paper trays (or the manual feed tray) for your specific print job. If you print to the BarryPrint print queue, that one does not support/allow selecting staples or specific paper trays.
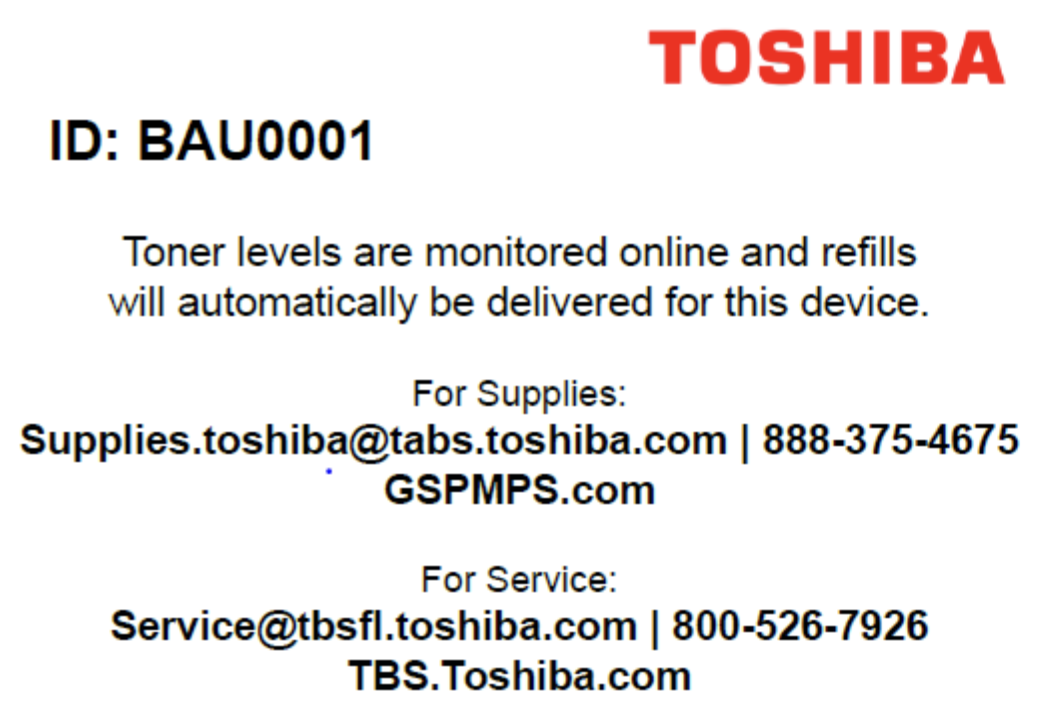
How to Report a Problem or Order Supplies
On each of the new MFPs is a label with the device ID number as well as a email and contact number for Toshiba support (see example below). If you encounter any issues printing or with the device, call the service number or send an email and provide the ID number of the device and a description of the problem. Toner supplies will be monitor and automatically delivered, however if you run out before new toner is received, you can use the supplies contact info to check status or order new supplies.